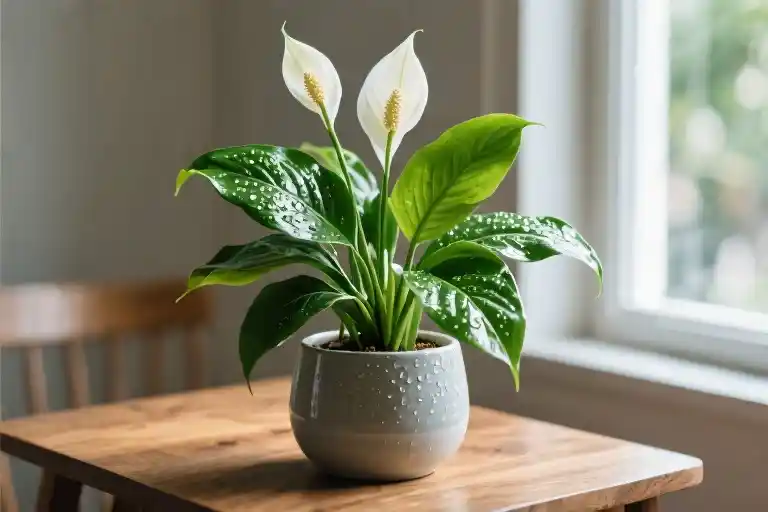
The peace lily sits quietly in countless living rooms and offices, its glossy leaves and white blooms masking a quiet struggle. Nearly 70% of these elegant plants meet an untimely end due to one simple mistake: overwatering. That damp enthusiasm, that desire to nurture, becomes the very thing that drowns them.
These resilient plants have survived for centuries, adapting to the dim forest floors of tropical Americas. Yet they often perish in our care, not from neglect but from misplaced attention. The irony isn’t lost on those who’ve watched their once-thriving lily wilt despite daily watering, its leaves turning yellow like fading parchment.
What makes the peace lily different from other houseplants isn’t its fragility—it’s the way it communicates. Drooping leaves signal thirst within hours, brown tips whisper about dry air, and yellowing foliage tells stories of light starvation. Learning this language requires no special tools or degrees, just a willingness to observe and adjust.
This guide won’t burden you with complex routines or expensive equipment. Instead, we’ll focus on three fundamental shifts that could save your plant: understanding its lighting sweet spot, mastering the art of watering less, and creating the humidity it craves. These aren’t abstract theories but battle-tested methods refined through countless rescues of drowning, starving, and light-deprived lilies.
Perhaps you’re here because your peace lily’s leaves have developed those telltale brown tips, or maybe it hasn’t flowered in months despite your care. Whatever brought you, the solution begins with unlearning one persistent myth: that more care equals better growth. Sometimes what these plants need most is our restraint—and the wisdom to interpret their silent requests.
Light: Finding the Sweet Spot
Peace lilies have a complicated relationship with light. They crave brightness but recoil from direct sun, like a pale-skinned beachgoer who forgot their sunscreen. The leaves tell the whole story – those elegant green blades will develop unsightly brown scorch marks when exposed to too much direct light, while insufficient illumination leads to sparse growth and reluctant flowering.
East-facing windows often provide the ideal conditions, offering gentle morning sun that fades before the intense afternoon rays arrive. North-facing windows work nearly as well, providing consistent indirect light throughout the day. I’ve kept peace lilies thriving in a north-facing bathroom where they received nothing more than ambient light filtered through frosted glass.
For those dealing with darker spaces, all isn’t lost. Modern LED grow lights have become surprisingly affordable and effective. A basic 15-watt full-spectrum bulb positioned about 12 inches above the plant for 12-14 hours daily can substitute for natural light. The energy cost runs about $5-10 annually – less than replacing a repeatedly failing plant. I’ve had particular success with clamp-style grow lights that attach to shelves or tables, providing adjustable illumination without permanent installation.
Signs your peace lily needs more light include:
- Stretching stems reaching toward windows
- Fewer white flowers (or none at all)
- Smaller new leaves than older growth
Conversely, symptoms of too much light appear as:
- Yellow or bleached patches on leaves
- Brown, crispy leaf edges
- Soil drying out unusually fast
The plant’s behavior offers the best guidance. Observe how your peace lily responds after moving it to a new location – perkier leaves and new growth indicate you’ve found its happy place. It’s a gradual dance of adjustment rather than an exact science, which makes the eventual success all the more satisfying when those distinctive white spathes finally emerge.
Watering: Less Is More
The peace lily’s dramatic droop when thirsty makes it one of the most communicative houseplants you’ll ever own. Those elegant leaves will sag like a disappointed ballet dancer when hydration runs low—but here’s the twist: more water isn’t always the answer. This plant thrives on attentive neglect, where the sweet spot between drought and drowning requires understanding its silent language.
The Finger Test Decoded
Forget complicated moisture meters. Your index finger remains the most reliable tool for peace lily care. Push it gently into the soil up to the first knuckle—about an inch deep. If the soil feels cool and slightly sticks to your skin, resist watering. When it emerges dry with only dusty particles clinging to it, prepare room-temperature water (left overnight to dissipate chlorine) until liquid escapes the drainage holes. The entire process should feel like testing bathwater for a child—not scalding, not icy, just pleasantly neutral.
Seasonal Shifts in Hydration
Summer turns your peace lily into a thirsty socialite sipping weekly cocktails, while winter transforms it into a meditating monk requiring only occasional offerings. From May through September, weekly watering typically satisfies, but always verify with the finger test first. During October to April, stretch intervals to 10-14 days as growth slows. Homes with forced-air heating may need exceptions—observe leaf posture rather than clinging to calendar dates. A lightweight pot signals dryness faster than heavy, waterlogged containers.
Reading the Leaves
Overwatering and underwatering both cause drooping, but their visual signatures differ. Chronic thirst creates crisp, papery leaves that curl inward like closed books, while soggy roots produce limp, yellowing foliage that feels unnaturally heavy. When in doubt, err on the side of dryness—peace lilies recover faster from temporary dehydration than root rot. Those iconic white blooms (technically spathes) will abort themselves during drought stress as a survival mechanism, but new ones emerge once conditions improve.
Water Quality Matters
These plants develop brown leaf tips when subjected to tap water’s harsh minerals. While not fatal, it mars their aesthetic appeal. For pristine foliage, use filtered water or let tap water sit uncovered for 24 hours—this allows chlorine and fluoride to evaporate. Rainwater collection works beautifully for those willing to place containers outdoors during showers. In winter, ensure water reaches room temperature before application to avoid shocking the roots.
The Drainage Imperative
No watering discussion proves complete without addressing the container itself. Peace lilies demand pots with drainage holes—no exceptions. Saucers should be emptied 30 minutes after watering to prevent the dreaded ‘wet feet’ scenario. Those decorative cache pots without drainage? Use them as outer sheaths, placing the nursery pot inside and removing it for watering. Terracotta pots assist moisture regulation through their porous walls, while glazed ceramics retain water longer—factor this into your watering frequency.
Rescue Protocols
Discover a peace lily sitting in swampy soil? Immediate intervention involves:
- Gently removing the plant and inspecting roots—healthy ones appear white and firm, while rotten roots feel mushy and brown
- Trimming damaged roots with sterilized scissors
- Repotting in fresh, well-draining mix (ordinary potting soil amended with perlite works)
- Withholding water for 3-5 days to let wounds callous
- Resuming cautious watering only when the plant shows signs of recovery
For severely dehydrated specimens, submerge the entire pot in a water bath for 15 minutes, allowing gradual rehydration through the drainage holes. This prevents shock compared to top-watering parched soil that repels moisture.
The Humidity Connection
Watering alone can’t satisfy a peace lily’s tropical nature—atmospheric moisture completes the equation. Dry air accelerates soil evaporation, potentially tricking you into overwatering. Group plants together to create a microclimate, or place water-filled pebble trays beneath pots (ensure the pot sits above water level). Morning misting helps when done early enough for leaves to dry before nightfall, reducing fungal risks. In arid climates, occasional lukewarm showers mimic jungle downpours—just let excess water drain completely afterward.
Humidity and Temperature: The Silent Factors in Peace Lily Care
Peace lilies communicate their discomfort in subtle ways. While we obsess over watering schedules and light exposure, these plants often suffer from invisible stressors – improper humidity and temperature. Their tropical origins mean they thrive in conditions that mimic a warm, misty rainforest understory, not the dry, climate-controlled interiors we typically provide.
Creating a Humidity Haven
Three practical approaches can transform your space into a humidity-friendly zone for peace lilies. The simplest method involves regular misting with room-temperature water, ideally in the morning to allow leaves to dry before nightfall. For those who prefer low-maintenance solutions, placing the pot on a tray filled with water and pebbles creates ongoing evaporation. The water level should stay below the pebbles to prevent root rot while maintaining ambient moisture. For serious plant enthusiasts, a humidifier offers the most consistent results, especially during winter when indoor air becomes particularly dry.
Temperature Tolerance and Warning Signs
These plants show remarkable resilience within the 65-80°F (18-27°C) range, but exhibit clear distress outside these parameters. Leaves may develop dark patches when exposed to cold drafts from windows or air conditioning vents. During winter months, move plants away from single-pane windows where temperatures can drop drastically at night. If you notice slowed growth or leaf curling, check for heat sources like radiators or electronics that might be creating microclimates of excessive warmth.
Emergency Measures for Temperature Extremes
When temperatures accidentally dip below 60°F (15°C), peace lilies enter survival mode. Immediately relocate the plant to the warmest area of your home, avoiding direct heat sources. Trim any blackened foliage to redirect energy to healthy growth. For plants exposed to extreme heat, a thorough watering with tepid water helps stabilize their system, followed by placement in a shaded, cooler location. In both cases, recovery may take several weeks – patience becomes your most valuable tool.
The Humidity-Temperature Connection
Warmer air naturally holds more moisture, creating an important interaction between these two factors. A peace lily kept at 75°F (24°C) requires higher humidity than one kept at 68°F (20°C) to maintain equivalent moisture levels at the leaf surface. This explains why plants near heating systems often develop brown tips despite regular watering – the artificial heat drives faster transpiration without compensating humidity. Observing where new leaf growth emerges healthiest in your home provides the best indicator of ideal placement.
Practical Adjustments for Different Seasons
Seasonal changes demand corresponding care modifications. Summer often brings adequate warmth but may require increased humidity through additional misting. Winter presents the opposite challenge – dry air from heating systems combined with cooler temperatures. Grouping plants together creates beneficial microclimates, as their collective transpiration raises local humidity. During transitional seasons, monitor weather changes closely; a sudden cold snap after turning off air conditioning or an unseasonably warm autumn day can both trigger stress responses.
Understanding these invisible factors transforms peace lily care from guesswork to intentional cultivation. While light and water dominate most plant care discussions, mastering humidity and temperature control often makes the difference between a surviving plant and a thriving one.
Diagnosing Peace Lily Problems: A Symptom-Based Guide
Peace lilies communicate their distress through visible changes in their leaves and overall posture. Learning to interpret these signs is crucial for timely intervention. Unlike more delicate houseplants, peace lilies are remarkably forgiving when you address issues promptly.
Yellow Leaves: The Plant’s Warning Signal
When leaves turn yellow, it’s rarely a single cause. The pattern of discoloration tells the story:
- Uniform yellowing across older leaves typically indicates overwatering or poor drainage. Check if the pot feels heavier than it should, or if water pools on the soil surface. The solution? Reduce watering frequency and consider repotting with fresh, well-draining mix.
- Yellow edges progressing inward often signals underwatering or low humidity. The leaves may feel papery. Try the finger test – if the top two inches of soil feel dry, it’s time for a thorough watering. For humidity issues, cluster plants together or use the pebble tray method.
- Patchy yellow spots usually mean too much direct sunlight. Peace lilies prefer dappled light, like what filters through tree canopies in their natural habitat. Move the plant further from windows or filter light with sheer curtains.
Brown Tips and Edges: The Humidity Barometer
Those frustrating brown tips are the plant’s equivalent of chapped lips. While they won’t revert to green, you can prevent further damage:
- Increase ambient humidity above 40% using any of these methods:
- Group plants together to create a microclimate
- Place on a tray with water and pebbles (ensure the pot isn’t sitting in water)
- Run a humidifier during dry seasons
- Flush the soil every few months to prevent salt buildup from fertilizers, which can cause tip burn. Water thoroughly until it runs freely from drainage holes.
- Trim affected tips at an angle following the leaf’s natural shape, using clean scissors. This improves appearance without stressing the plant.
Wilting Drama: Underwatering vs. Overwatering
Peace lilies are theatrical when thirsty – their leaves droop dramatically but usually perk up within hours of watering. If they don’t recover:
- Persistent wilting with yellow leaves suggests root rot from overwatering. Gently remove the plant to inspect roots. Healthy roots are firm and white, while rotten ones are mushy and brown. Prune affected roots and repot in fresh soil.
- Crispy, curled leaves with wilting indicates chronic underwatering. The soil may have become hydrophobic. Try bottom-watering by placing the pot in a shallow water bath for 30 minutes to rehydrate the root ball.
When Flowers Won’t Come
Mature peace lilies that refuse to bloom often need:
- More bright, indirect light (but never direct sun)
- A slight reduction in watering during winter to simulate a dormant period
- Monthly fertilizer during growing season (diluted to half strength)
Remember that young plants may take 12-18 months to mature enough for flowering. Patience is part of the peace lily’s lessons.
Emergency Interventions
For severely distressed plants:
- Root Revival: If roots are compromised but some healthy ones remain, repot in fresh soil and cover with a clear plastic bag (like a mini greenhouse) for 2-3 weeks to increase humidity while roots recover.
- Leaf CPR: When only a few healthy leaves remain, cut back damaged foliage to redirect energy. Maintain consistent care and wait – peace lilies can rebound from near total leaf loss.
- Last Resort Propagation: If the main plant is failing but has healthy stems, you can attempt division or stem cuttings in water. Even a single healthy leaf with its node can potentially grow new roots.
The resilience of peace lilies never ceases to amaze. With attentive care guided by these diagnostic clues, your plant will likely recover its lush beauty. Those white blooms will return when the time is right – a living reminder that growth happens on nature’s schedule, not ours.
Propagating Your Peace Lily: A Simple Guide to Division
That moment when your peace lily starts overflowing its pot isn’t just a sign to upgrade containers – it’s nature giving you free plants. Division stands as the most reliable method for propagating these tropical beauties, requiring nothing more sophisticated than clean hands and sharp scissors.
When to Divide
Look for these telltale signs:
- Multiple crowns competing for space
- Roots circling the bottom or emerging from drainage holes
- Soil drying out suspiciously fast between waterings
Spring through early summer offers ideal conditions, as the plant enters its active growth phase. Avoid winter division unless addressing root rot emergencies.
The Division Process
- Hydrate the plant thoroughly 24 hours beforehand to reduce transplant shock
- Gently remove the entire root ball, supporting the base of the stems
- Identify natural separations where clusters of leaves emerge independently
- Tease apart roots with fingers for smaller divisions; use a sterilized knife for stubborn sections
- Ensure each new section retains:
- 3-5 healthy leaves
- Its own root system
- At least one growing point
Post-Division Care
Newly separated plants need extra TLC:
- Use fresh, well-draining potting mix in containers just 1-2 inches larger than the root ball
- Water lightly to settle soil, then wait until the top inch dries before next watering
- Provide bright indirect light and boost humidity with a clear plastic bag tent (ventilated daily)
- Hold off fertilizing for 4-6 weeks to prevent root burn
Encouraging Blooms in Divided Plants
While peace lilies may temporarily halt flowering after division, these strategies help:
- Maintain consistent moisture – drought stress prioritizes survival over blooms
- Provide 12-14 hours of bright indirect light daily
- Use a phosphorus-rich fertilizer (like 10-30-10) once new growth appears
- Keep nighttime temperatures above 65°F (18°C)
Patience proves essential. It typically takes 3-6 months for divided plants to establish sufficiently for flowering. That first pristine white spathe emerging from a plant you created yourself? Worth every moment of waiting.
Share Your Peace Lily Journey
Every peace lily has a story to tell. Maybe yours arrived as a gift from a friend who swore it was “impossible to kill.” Perhaps you rescued it from a clearance rack, its leaves drooping with neglect. However your plant came into your life, its survival—and now thriving—represents small victories worth celebrating.
These glossy-leaved companions often become silent witnesses to our lives. They sit patiently on office desks through late nights, brighten dim apartment corners, and occasionally startle us with sudden dramatic wilting when we’ve forgotten their water needs. Their white blooms emerge unexpectedly, like quiet applause for getting the care basics right.
What transformation has your peace lily undergone? Did you discover that moving it three feet away from the window stopped those brown leaf tips? Maybe you finally mastered the watering rhythm after months of trial and error. However simple or dramatic your experience, these stories matter. They remind new plant owners that everyone starts somewhere, that even the most neglected peace lily can rebound with adjusted care.
Beyond Peace Lilies: Five Challenging Houseplants
Having mastered peace lily care, you might feel ready to expand your indoor garden. Consider these five plants that will test your growing skills—each beautiful, each with particular demands that make peace lilies seem forgiving by comparison.
Fiddle Leaf Fig (Ficus lyrata) demands consistency in light and watering. Unlike peace lilies that signal thirst clearly, these trendy trees suffer silently until leaves begin dropping en masse. They crave bright, indirect light year-round and despise being moved once acclimated.
Maidenhair Fern (Adiantum) makes peace lilies seem drought-tolerant. These lacy beauties require near-constant moisture in both soil and air. Where peace lilies tolerate occasional dryness, maidenhairs perish dramatically within hours of missed watering.
Orchids (Phalaenopsis) challenge our understanding of plant care cycles. While peace lilies follow relatively straightforward seasonal patterns, orchids demand specific light changes, temperature drops, and drying periods to trigger reblooming.
String of Pearls (Senecio rowleyanus) introduces the complexities of succulent care. Unlike moisture-loving peace lilies, these trailing strings store water in their spherical leaves and require completely different soil and watering approaches.
Calathea (Goeppertia) shares the peace lily’s humidity needs but amplifies them dramatically. Their vividly patterned leaves curl and crisp at the slightest dry air, making them ideal for those who’ve mastered pebble trays and humidifiers with their peace lilies.
Each of these plants offers unique rewards for attentive caretakers. The fiddle leaf’s architectural presence, the maidenhair’s delicate movement, the orchid’s exotic blooms—they all bring something extraordinary to indoor spaces. But as your peace lily has likely taught you, the real joy comes not just from the plant’s beauty, but from understanding and meeting its particular needs.
Your next plant adventure awaits. Will it be the dramatic fiddle leaf or the temperamental calathea? Perhaps something entirely different. Whatever you choose, remember the lessons from keeping your peace lily thriving: observe closely, adjust patiently, and celebrate every new leaf.
